Waterproofing drywall in your garage is a crucial step to ensure the longevity of your walls, protect your belongings, and maintain a clean, dry space. Garages are typically exposed to fluctuating temperatures, moisture, and even flooding, making drywall particularly vulnerable to damage if not properly treated whether you’re transforming your garage into a workshop, or storage space, or simply protecting it from the elements, knowing how to waterproof drywall is essential.
In this article, we’ll delve into how to waterproof drywall in a garage, explore various techniques, and highlight the best materials to use for long-term protection. We’ll also cover common mistakes to avoid, ensuring that your garage drywall stays dry, sturdy, and functional for years to come.
Why Waterproofing Drywall in a Garage is Important
Garages often serve as multipurpose spaces, exposed to environmental factors that can lead to moisture buildup and even flooding. Without proper waterproofing, the drywall in your garage can quickly become a breeding ground for mold and mildew, weaken over time, and eventually collapse. Not only does this cause damage to your home, but it can also lead to costly repairs.
Waterproofing your drywall offers multiple benefits:
- Prevents mold and mildew growth: Excess moisture can lead to unhealthy mold, which can cause respiratory issues.
- Increases durability: Waterproofing ensures that your drywall can withstand environmental changes, humidity, and occasional exposure to water.
- Protects stored items: Many people use their garages for storage, and keeping drywall dry ensures that moisture won’t seep into stored materials or goods.
- Improves resale value: A well-maintained garage, free of water damage, enhances the overall value of your property.
Assessing the Condition of Your Garage Drywall
Before starting the waterproofing process, it’s essential to evaluate the condition of your existing drywall. Some garages may already show signs of damage, especially if they’ve been exposed to water or high humidity levels.
Here’s how to assess the drywall in your garage:
Look for visible signs of water damage: Stains, discoloration, and peeling paint are all signs that water has affected your drywall.
Check for cracks or bulges: These can indicate long-term moisture exposure or water seeping in from the walls or roof.
Feel for soft spots: If any part of the drywall feels spongy or soft, it may already be water-damaged and require replacement.
Inspect for mold: Black or green patches on the drywall signal the presence of mold, which will need to be treated before waterproofing.
If your drywall is severely compromised, you may need to replace it before proceeding with the waterproofing process.
Materials Needed for Waterproofing Garage Drywall
To effectively waterproof drywall in your garage, you’ll need the right materials. Each material plays a critical role in ensuring that your drywall can withstand moisture and humidity.
Here are some essential materials to consider:
Waterproof drywall (Greenboard or Purpleboard)
Unlike regular drywall, these specialized boards are moisture-resistant and are the best starting point for a waterproof garage.
Waterproofing Primer
A high-quality primer creates a protective layer over the drywall, preventing moisture from penetrating the surface.
Waterproof Sealant
This helps seal any gaps, seams, or joints in the drywall that could allow moisture to enter.
Fiberglass Mesh Tape
Used to reinforce seams between drywall panels and prevent cracks.
Waterproof Paint
This adds an extra layer of protection against moisture after applying the primer.
Vapor Barrier
Installing a vapor barrier behind the drywall can help prevent moisture from seeping through from exterior walls.
Step-by-Step Guide to Waterproofing Drywall in a Garage
Step 1. Choose the Right Drywall
The first and most important step in waterproofing is selecting the right type of drywall. Regular drywall is not designed to handle high moisture areas, so for your garage, you’ll want to install water-resistant drywall, commonly known as green board or purple board. These are designed specifically for wet areas like garages, basements, and bathrooms.
- Green board: Made with a moisture-resistant core, it’s widely used in areas exposed to humidity.
- Purple board: Offers even better water resistance and mold prevention, making it ideal for garage walls prone to occasional water exposure.
Step 2. Install a Vapor Barrier
To further protect your drywall, install a vapor barrier behind it. This is especially important in garages with poor insulation or that are attached to a home. A vapor barrier can be a plastic sheeting that is installed behind the drywall, acting as an extra layer of protection against moisture. It prevents water from seeping in through the walls and reaching the drywall.
Step 3. Use Waterproof Primer
Once your drywall is installed, apply a waterproof primer. A primer serves as the first line of defense against moisture. It penetrates the drywall, creating a sealed surface that prevents water from getting in. Be sure to choose a primer that is designed for use in damp environments.
Steps to apply primer:
- Clean the drywall surface thoroughly.
- Use a roller to apply the primer evenly across the drywall.
- Allow the primer to dry completely before moving on to the next step.
Step 4. Apply Fiberglass Mesh Tape to the Seams
Cracks or gaps between drywall panels are weak points where moisture can easily enter. To prevent this, use fiberglass mesh tape on all seams between panels. The mesh tape reinforces the drywall, ensuring a smooth, gap-free surface that’s less susceptible to moisture penetration.
Apply the tape over the seams, pressing it firmly onto the surface, then cover it with a joint compound to ensure a smooth, seamless finish.
Step 5. Seal Gaps with Waterproof Sealant
After applying the mesh tape and joint compound, it’s crucial to seal any remaining gaps, especially around the edges and corners of the drywall. Use a waterproof sealant to fill in these areas and create a moisture-proof barrier.
Common areas to apply sealant include:
- Around door and window frames
- Where the drywall meets the floor or ceiling
- Any gaps around outlets or other fixtures
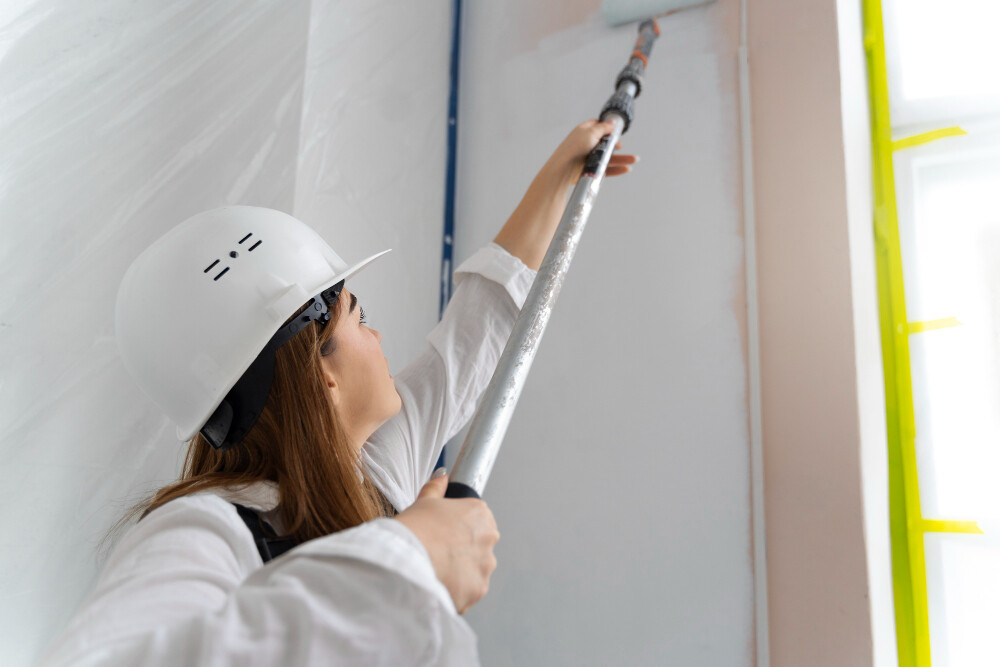
Step 6. Apply Waterproof Paint
Finally, apply a coat of waterproof paint to your garage drywall. Waterproof paint is designed to repel water, creating an additional barrier that protects the drywall from moisture damage.
Steps to apply waterproof paint:
- Choose a light or neutral color for the best results, as dark colors tend to show imperfections more easily.
- Use a roller to apply the paint evenly across the surface.
- Apply a second coat for added protection, ensuring complete coverage.
Additional Tips for Maintaining a Waterproof Garage Drywall
Once your garage drywall is waterproofed, it’s essential to maintain it properly to ensure long-term durability. Here are some tips to keep your drywall in good condition:
- Keep your garage well-ventilated: Moisture builds up quickly in enclosed spaces, so make sure to install vents or use dehumidifiers to reduce humidity levels.
- Inspect your drywall regularly: Look for signs of water damage or mold growth and address any issues immediately.
- Seal garage doors and windows: Water can seep into your garage from doors and windows. Ensure that they are properly sealed and check for leaks after heavy rainfall.
- Use garage floor mats: Place mats under vehicles to absorb any water, snow, or ice that may melt and pool on the garage floor, reducing the risk of moisture reaching your drywall.
Common Mistakes to Avoid When Waterproofing Drywall
- Skipping the primer: Some homeowners think they can skip priming their drywall, but this is a crucial step in waterproofing. Primer seals the drywall and prevents it from absorbing water.
- Using regular drywall: Regular drywall is not designed for moisture-heavy areas like garages. Make sure to use moisture-resistant options like green board or purple board.
- Neglecting gaps: Failing to seal seams, corners, or gaps properly can lead to moisture seeping into the drywall, undermining your waterproofing efforts.
Conclusion
Waterproofing drywall in a garage is an essential step to ensure your walls stay durable, dry, and mold-free. By following the right steps—choosing moisture-resistant drywall, using primer, applying fiberglass tape, sealing gaps, and using waterproof paint—you can protect your garage drywall from the damaging effects of moisture.
Understanding how to waterproof drywall in a garage not only prevents expensive repairs but also enhances the longevity of your space, keeping it functional and safe for years to come. Whether you’re a DIY enthusiast or a professional drywall installer, applying these techniques will make a world of difference in the quality and durability of your garage walls.
Take the time to waterproof your drywall properly, and you’ll enjoy a cleaner, safer, and more resilient garage for all your projects and storage needs.