A skim coat is one of the most effective techniques used in drywall finishing to achieve a smooth, flawless surface. Whether you’re renovating an older home, repairing damaged drywall, or preparing walls for high-end paint or wallpaper, skim coating drywall delivers professional-level results when done correctly.
This guide explains what a skim coat is, how it works on walls and ceilings, the tools required, advantages and disadvantages, and a clear step-by-step process designed for both homeowners and professionals.
What Is a Skim Coat?
A skim coat is a thin, even layer of joint compound applied across a drywall surface to smooth out imperfections. Unlike patching, which targets specific problem areas, skim coating covers the entire wall or ceiling to create a uniform finish.
Skim coating is commonly used to:
- Hide small cracks, dents, and uneven joints
- Smooth previously textured surfaces
- Achieve a paint-ready or Level 5 drywall finish
- Improve the appearance of walls under strong lighting
The compound is applied thinly and built up in multiple coats, then sanded smooth for a seamless appearance.
Drywall Skim Coat Explained
A drywall skim coat refers specifically to skim coating applied over drywall panels. This process goes beyond standard taping and mudding by treating the entire surface rather than just seams and fasteners.
Professionals often use skim coating to:
- Correct uneven drywall installation
- Repair poorly finished drywall
- Upgrade walls before repainting
- Eliminate texture without replacing drywall
When done properly, skim coating drywall creates a surface that looks new, flat, and professionally finished.
Skim Coat Walls vs Skim Coat Ceiling
While the concept remains the same, skim coating walls and ceilings require slightly different techniques.
Skim Coat Walls
Skim coating walls is generally more manageable. Gravity helps the compound stay in place, allowing smoother application and easier control. Walls typically require fewer coats and less physical effort.
Skim Coat Ceiling
Skim coating a ceiling is more challenging due to overhead application. Thinner coats, smaller working sections, and proper blade control are essential to prevent sagging or falling compound. Ceilings often require additional drying time and careful sanding.
Skim Coating Drywall: Essential Tools
Using the right tools significantly improves both efficiency and final results.
Primary Skim Coat Tools
- Wide drywall knives (10–12 inches) for smooth application
- Trowels or flexible finishing blades for large surfaces
- Mud pan for holding compound
- Sanding pole or sanding block
Supporting Tools
- Mixing drill or paddle for a consistent compound
- Drop cloths and masking materials
- Dust mask and eye protection
High-quality tools reduce visible lines, minimize sanding, and produce cleaner finishes.
Step-by-Step Guide to Skim Coating Drywall
Skim coating is a process that rewards patience and proper technique. Below is a clear, practical breakdown of each stage.
Step 1: Surface Preparation
Begin by cleaning the wall or ceiling thoroughly. Remove dust, grease, loose paint, and debris. Repair deeper cracks, holes, or damaged drywall before skim coating.
If the surface is glossy or previously painted, lightly sand it to improve adhesion. Any loose texture should be scraped down. Skim coating should only be applied to solid, stable surfaces.
Proper preparation ensures the skim coat bonds evenly and prevents future peeling or cracking.
Step 2: Mixing the Joint Compound
Mix joint compound with clean water until it reaches a smooth, creamy consistency. The compound should spread easily without dripping or dragging.
Avoid overly thick compound, which causes ridges, and overly thin compound, which may sag. Mixing thoroughly eliminates air bubbles and creates a more uniform finish.
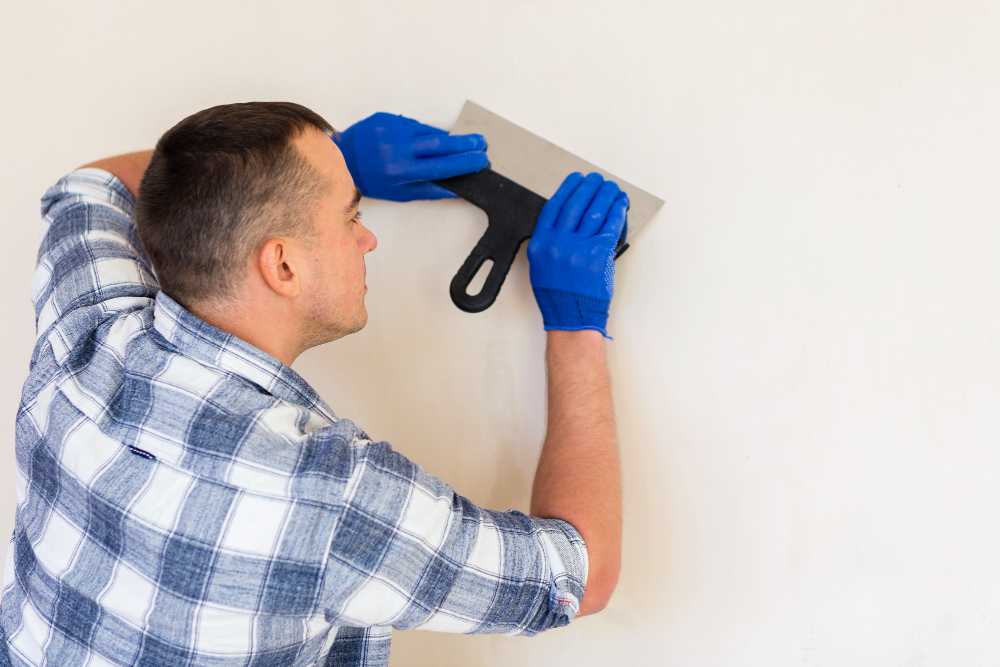
Step 3: Applying the First Skim Coat
Using a wide drywall knife or trowel, apply a thin layer of compound across the surface using long, controlled strokes. Work in sections and overlap strokes slightly.
The first coat focuses on coverage rather than perfection. Minor lines and tool marks are expected and will be addressed in later coats.
Step 4: Drying and Light Sanding
Allow the first coat to dry completely. Drying time depends on temperature, humidity, and airflow.
Once dry, lightly sand the surface to remove high spots and obvious lines. Do not sand aggressively. Remove all dust before proceeding.
Step 5: Applying the Second Skim Coat
The second skim coat refines the surface. Apply a thinner layer than the first coat, focusing on smoothing imperfections and feathering edges.
Use consistent pressure and cleaner strokes. This coat significantly improves surface smoothness and may be sufficient for many wall applications.
Step 6: Optional Third Skim Coat
A third skim coat is recommended for ceilings, high-gloss paint finishes, or areas exposed to strong lighting. This coat should be extremely thin and focused on eliminating subtle imperfections.
Minimal sanding is required when this coat is applied correctly.
Step 7: Final Sanding and Inspection
After the final coat dries, lightly sand the surface using fine-grit sandpaper. Focus on smoothing transitions and removing faint lines.
Clean the surface thoroughly and inspect under good lighting. Any remaining flaws should be spot-corrected before priming.
Step 8: Priming Before Painting
Always prime skim-coated drywall. Primer seals the porous compound, ensures even paint absorption, and improves durability.
Once primed, the surface is ready for final paint or decorative finishes.
Advantages of Skim Coat
- Creates a smooth, professional finish
- Hides minor wall imperfections
- Improves paint adhesion and appearance
- Extends the life of paint finishes
- Cost-effective alternative to drywall replacement
Skim coating is especially valuable when upgrading older or damaged interiors.
Disadvantages of Skim Coat
- Time-consuming due to multiple coats and drying time
- Requires skill to achieve professional results
- Produces dust during sanding
- Not suitable for major structural damage
Understanding these limitations helps set realistic expectations before starting.
Frequently Asked Questions About Skim Coating
How many skim coats are needed?
Most projects require two coats. Textured surfaces, ceilings, or premium finishes may require three.
Can beginners skim coat drywall?
Yes, but it takes practice. Uneven pressure and overworking the compound are common beginner mistakes.
Is skim coating better than replacing drywall?
For cosmetic issues, skim coating is far more cost-effective. Severely damaged drywall should be replaced.
Can skim coat be applied over painted walls?
Yes, as long as the surface is clean, lightly sanded, and properly prepared.
Does skim coating strengthen drywall?
It improves surface durability but does not replace structural repairs.
Final Thoughts
Skim coating drywall is one of the most effective ways to transform walls and ceilings without major renovation. When done correctly, it delivers smooth, modern finishes that elevate any interior space.
By understanding the tools, techniques, advantages, and limitations, skim coating becomes a reliable solution for both repairs and aesthetic upgrades.